Session Handling Action - Extending Burp's Session Handling with Extensions
One of the key components of Burp's Extender API is the SessionHandlingAction interface which can be used to create session handling actions that extend the already existing session management in BurpSuite. These actions can be configured to run at specific points during the processing of HTTP requests, enabling automation of tasks like re-authentication, token management, or custom header insertion.
Session handling actions integrate with Burp Suite's request processing workflow. They can be configured in the Session Handling Rules, which determine how and when these actions are invoked. This allows seamless integration with tools like the Proxy, Repeater, Intruder, and Scanner.
Custom session handling actions are useful in scenarios such as:
- Automated Re-authentication: When a session expires, the extension can automatically log back in.
- Token Management: Extracting tokens from responses and injecting them into subsequent requests.
- Custom Authentication Flows: Handling multi-step authentication processes not supported by default.
- Dynamic Request Modification: Altering requests based on specific criteria or state.
In this module, we'll demonstrate how to integrate custom session handling logic into Burp Suite using Jython. We'll walk through creating a Jython extension that automatically logs into a web application with a tricky authentication flow by sending a POST request to the /login endpoint with configured credentials.
The problem to solve
If you want to follow along already, you can start the lab exercise at the bottom of this page.
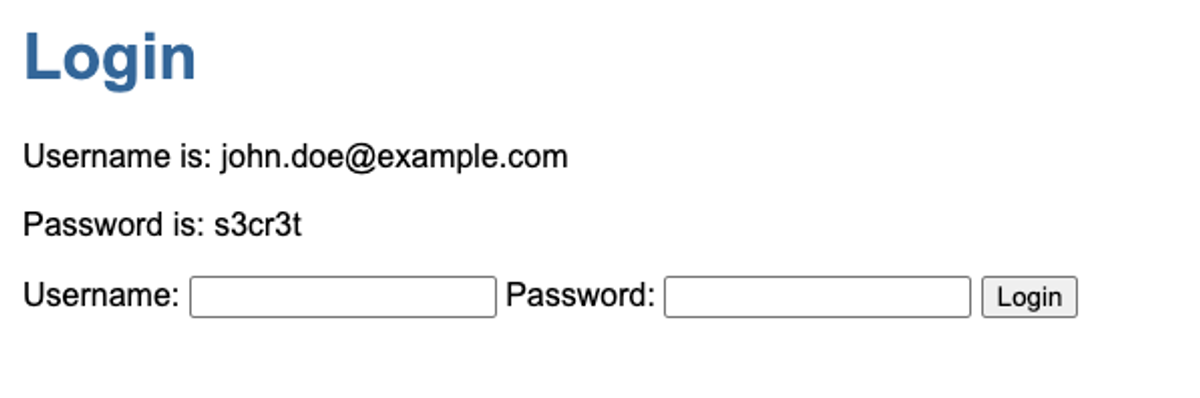
Alright, so upon first sight the login form looks quite simple.
We log in, we tick a box, we get logged back out. Alright.
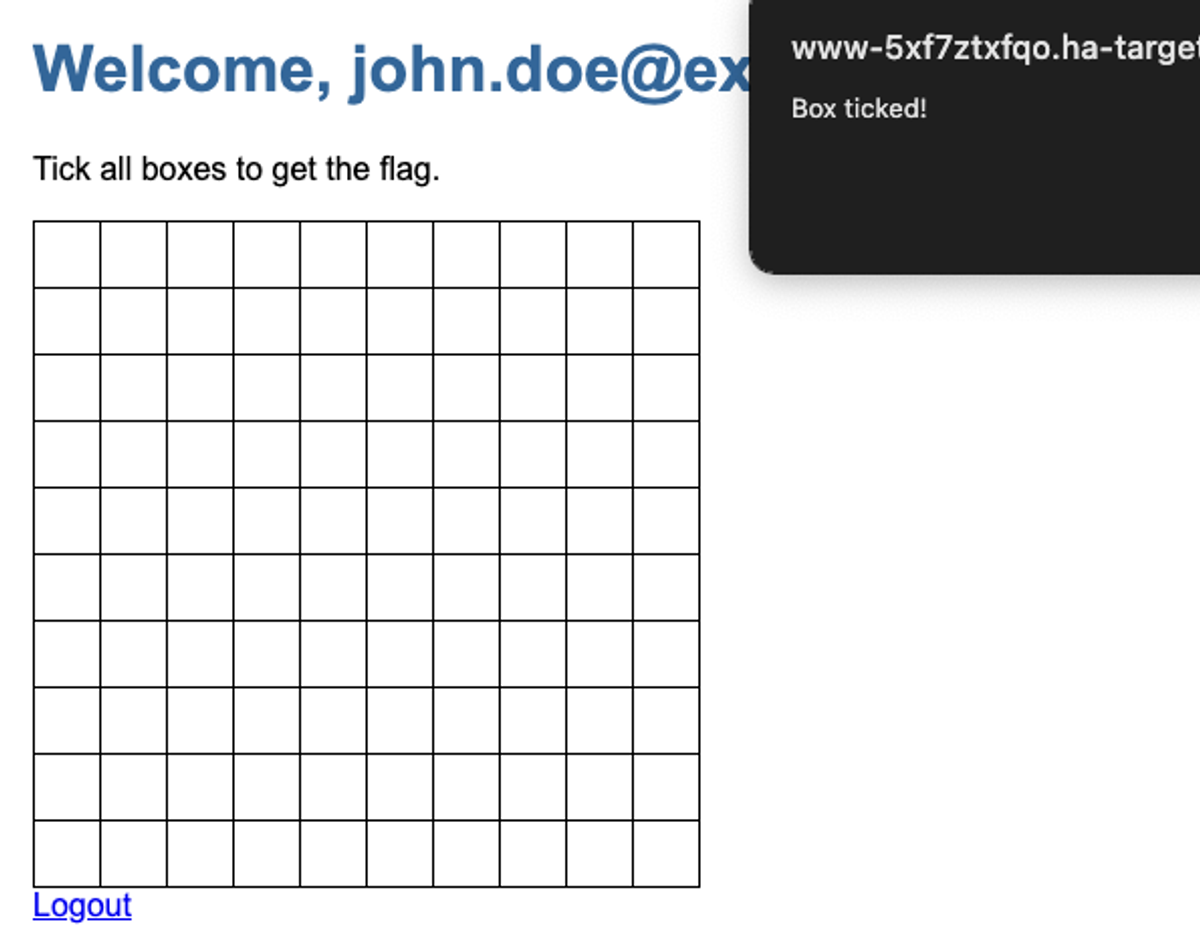
No way are we doing this 100 times manually. We want Burp to keep us logged in while Intruder takes care of sending the 100 requests for each box, we'll just increment a number for the X axis and for the Y axis.
Ok, so we are going to need a session macro to send the login request. Easy peasy. Let's take look at the request.
POST /login HTTP/2
Host: www-5xf7ztxfqo.ha-target.com
Cookie: HakatemiaLabSessionAffinity=f4f5761d0a3cdae05aee677ec9e940c3|766d492e152f0eb48bca4df922227d80; session=721b2d8f-e5d3-4d19-9417-865472817ab6
...
username=john.doe%40example.com&password=s3cr3t×tamp=1732040519&checksum=9f76872042fb7bae07c1c85d8ee7fc6dOoookay... That looks a little concerning. A timestamp? A checksum? Let's take a look at the HTML source to see what's happening here. Right click, "View Source"...
1<body>
2    <h1>Login</h1>
3    <p>Username is: [email protected]</p>
4    <p>Password is: s3cr3t</p>
5    <form method="post" action="/login" onsubmit="return addHashData(this)">
6      <label for="username">Username:</label>
7      <input type="text" id="username" name="username" required />
8      <label for="password">Password:</label>
9      <input type="password" id="password" name="password" required />
10
11      <input type="hidden" name="timestamp" id="timestamp" />
12      <input type="hidden" name="checksum" id="checksum" />
13
14      <button type="submit">Login</button>
15    </form>
16
17
18    <script>
19      function addHashData(form) {
20        const timestamp = Math.floor(Date.now() / 1000);
21        const username = form.username.value;
22        const password = form.password.value;
23
24        form.timestamp.value = timestamp;
25        const dataToHash = username + password + timestamp;
26        form.checksum.value = CryptoJS.MD5(dataToHash).toString();
27
28        return true;
29      }
30    </script>
31
32  </body>
Okay, so now we can see how those values are calculated. The timestamp is an epoch (aka unix timestamp, aka seconds elapsed since the beginning of 1970). And the checksum is a MD5 hash of all three concatenated in the following order: username, password, timestamp.
Seems that a session handling macro is not going to cut it this time, we are going to have to get our hands dirty and write an extension.
Learn to hack — start here
Hundreds of interactive courses, virtual labs and CTF challenges in your browser. Start a free trial — no card required.